
“Respect the rotisserie chicken.” A reader wrote to me last week with that gem of a sentence, and I want to put it on hats and tote bags.
I’d asked you all for your cost-saving strategies in these dizzyingly expensive times. You replied en masse, with fascinating emails that detailed your grocery-shopping and cooking habits and shared a glimpse into your lives, whether you’re in Alaska or Australia (both represented) or, most likely, somewhere in between.
Some of you are buying in bulk and going to the store less often. But — counterintuitively! I like it! — some of you are doing the exact opposite, shopping more often and buying less in each go. That way, you buy only what you need in that moment and avoid food waste from ignored groceries — the most expensive choice of all.
You also said you’re shopping your pantries, committing to cleaning out whatever is in the fridge at least one night a week; choosing ground meat over larger cuts or eating less meat altogether; and eating beans and freezing ingredients and leftovers like mad (there was lots of love for vacuum sealers). And, of course, you’re respecting the rotisserie chicken, famously a loss leader for markets like Costco, which makes it a good deal and one of the best dinner shortcuts out there. The best cost-saving advice of all: Eat out less, and cook more. The five recipes below are meant to give you budget-friendly options that are interesting and delicious.
White Chicken Chili
This easy chili comes together quickly, thanks to rotisserie chicken or leftover roast chicken and an ingredient list that leans heavily on pantry staples. Made with canned chiles and seeded jalapenos, this chili has a mild heat that can be intensified with the addition of ground cayenne or by leaving the seeds in the jalapenos. While some white chili recipes call for cream cheese or sour cream to thicken the broth, this one achieves a similar texture by mashing some of the white beans. If you prefer a creamy chili, feel free to stir in a large spoonful of sour cream just before serving. Or, include sour cream with a host of toppings — including crushed tortilla chips, shredded cheese, diced avocado and pickled jalapenos — to make this chili a customizable family favorite. — Lidey HeuckYield: 4 to 6 servings. Total time: 50 minutes.
Ingredients
2 tablespoons olive oil
1 large yellow onion, chopped
1 large jalapeno pepper, seeds and ribs removed, finely chopped
2 tablespoons minced garlic (about 5 cloves)
1 teaspoon dried oregano
1 teaspoon ground cumin
1/2 teaspoon sweet paprika or chili powder
Pinch of cayenne pepper, to taste
1 teaspoon kosher salt, plus more to taste (such as Diamond Crystal)
Freshly cracked black pepper
4 cups low-sodium chicken broth
2 (15-ounce) cans cannellini beans, rinsed and drained
2 (4-ounce) cans diced green chiles
2 1/2 to 3 cups cooked shredded chicken (from 1 roast chicken or rotisserie chicken)
1 cup fresh or frozen corn kernels
Half a lime, plus lime wedges for serving
Shredded cheddar or Monterey Jack cheese, pickled jalapeno slices, diced avocado, sour cream, chopped fresh cilantro and crushed tortilla chips, for serving (optional)
DIRECTIONS
1. In a large Dutch oven or pot, heat the olive oil over medium heat. Add the onion and jalapeno and cook, stirring often, until the onions are tender, about 6 minutes. Add the garlic, oregano, cumin, paprika, cayenne, salt and a few grinds of black pepper, and cook for 1 minute, until fragrant.
2. Add the chicken broth, cannellini beans and diced green chiles with their liquid; bring to a boil over medium-high heat. Lower the heat and simmer, stirring occasionally, until the broth has reduced by about half, 18 to 20 minutes. Off the heat, use a wooden spoon to mash some of the beans against the side of the pot. Continue mashing the beans until the broth is noticeably thicker.
3. Return the pot to medium, stir in the chicken and corn, and cook until heated through, about 3 minutes. Juice the lime half over the pot, then taste for seasonings and add more salt, black pepper, and cayenne, if desired.
4. Serve the chili in bowls topped as you like with a lime wedge, shredded cheese, pickled jalapeños, diced avocado, sour cream, chopped fresh cilantro, and/or crushed tortilla chips.
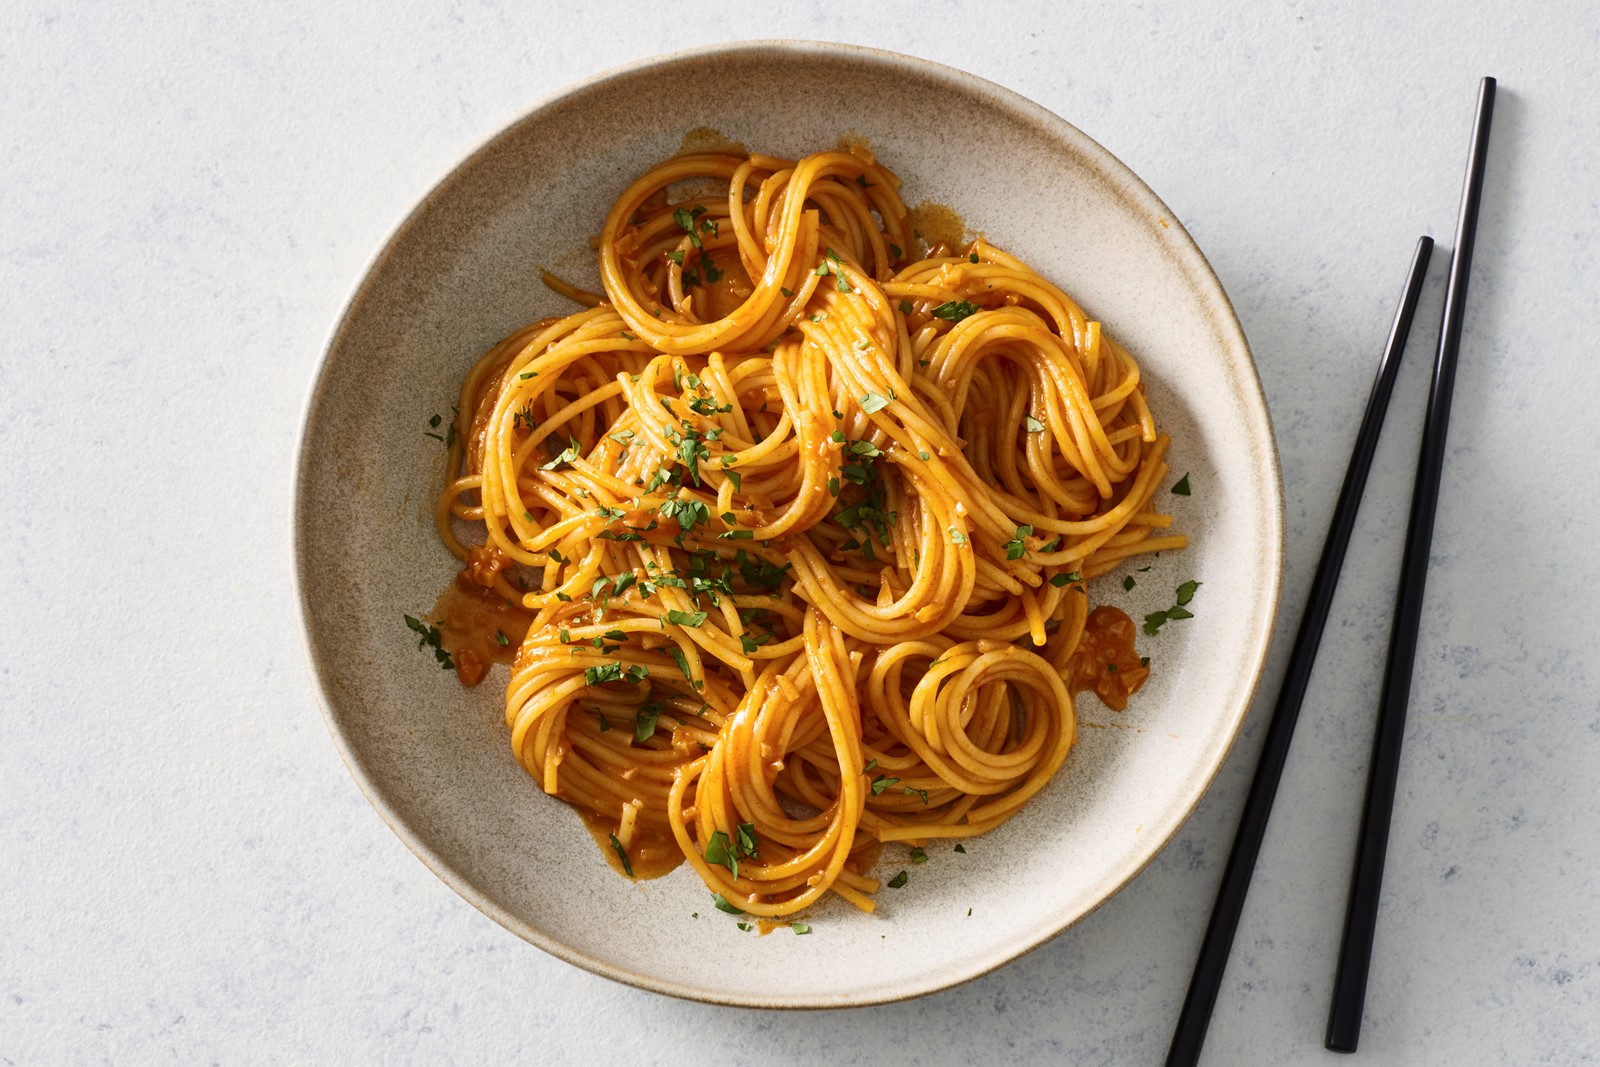
Gochujang Buttered Noodles
These garlicky, buttery noodles are perfect for when you need a stellar pantry meal lickety-split. A packet of fresh or even instant ramen speeds up the meal prep and is ideal when cooking for one (see tip below). Honey and sherry vinegar round out gochujang’s deep heat into a mellowness that’s at once sweet, savory and tangy. The brick-red butter sauce, emulsified with a splash of the pasta cooking water, coats spaghetti here, but you can use whatever noodles you like. — Eric Kim
Yield: 4 servings. Total time: 25 minutes.
Ingredients
1 pound spaghetti or other long pasta
6 tablespoons unsalted butter
12 garlic cloves, finely chopped (about 1/3 cup)
Salt and pepper
1/4 cup gochujang paste (not sauce; see tip below)
1/4 cup honey
1/4 cup sherry vinegar or rice vinegar
Finely chopped cilantro or thinly sliced scallions (optional)
DIRECTIONS
1. Bring a large pot of water to a boil. Add the spaghetti and cook according to package instructions. Reserve 1 cup of the cooking water. Drain the spaghetti and return to its pot.
2. While the pasta cooks, melt 4 tablespoons of the butter in a skillet over medium-low. Add the garlic and season generously with salt. Cook, stirring occasionally, until the garlic starts to soften but not brown, 1 to 3 minutes.
3. Stir in the gochujang, honey and vinegar, and bring to a simmer over medium-high. Cook, stirring constantly, until the mixture reduces significantly, 3 to 4 minutes; when you drag a spatula across the bottom of the pan, it should leave behind a trail that stays put for about 3 seconds. Remove from the heat.
4. Transfer the sauce to the pot with the spaghetti and add the remaining 2 tablespoons butter. Vigorously stir until the butter melts. Add splashes of the pasta cooking water, as needed, to thin out the sauce. Taste and season with salt and pepper. Top with the cilantro or scallions (if using) and serve immediately.
TIPS: Be sure to purchase plain gochujang paste, not gochujang sauce, which often includes additives like vinegar and sugar. To easily measure out gochujang, swipe the inside of a measuring cup with a little neutral oil, which will get it to slip right out.
To make a single serving, follow the recipe using 4 to 5 ounces fresh or instant ramen noodles; 1 1/2 tablespoons unsalted butter (1 tablespoon to fry the garlic and 1/2 tablespoon for the sauce at the end); 3 garlic cloves; 1 heaping tablespoon gochujang; 1 tablespoon honey; 1 tablespoon sherry vinegar or rice vinegar. Decrease the cook times throughout by 1 to 2 minutes.
Smashed Beef Kebab With Cucumber Yogurt
This quick skillet dinner of spiced, seared ground beef over cooling yogurt combines elements of two Persian classics: kebab koobideh (grilled kebabs) and mast-o-khiar (cucumber yogurt). The creamy yogurt base keeps close to the original, while the ground beef is hard-seared on one side like a scallop for a crisp texture. Walnuts and raisins, traditionally toppings for mast-o-khiar, get toasted in the beef fat, adding crunch and sweetness to balance the savory meat and tangy yogurt. — Zaynab Issa
Yield: 4 servings. Total time: 25 minutes.
Ingredients
2 cups full-fat or low-fat Greek yogurt (about 16 ounces)
2 mini cucumbers (about 1/2 pound), grated on the large holes of a box grater
3 tablespoons finely chopped mint, plus mint leaves for serving
1 large garlic clove, finely grated
1 pound ground beef (preferably 80% lean) or ground lamb
1 small yellow onion, grated on the large holes of a box grater (see tip below)
1/2 teaspoon ground turmeric
2 teaspoons kosher salt (such as Diamond Crystal)
Freshly ground black pepper
1/4 cup walnut halves or pieces, or both (see tip below)
2 tablespoons raisins or dried cranberries
Pomegranate molasses, optional, for serving
Warmed pita or white rice, for serving
DIRECTIONS
1. Add the yogurt, cucumbers, chopped mint and garlic to a medium bowl. Mix well to combine. Chill until ready to serve.
2. Add the beef, onion, turmeric, 1 teaspoon of salt and lots of black pepper to a second medium bowl and mix well to combine.
3. Heat a large well-seasoned cast-iron skillet (or other large heavy-bottomed pan) over medium-high. Once the skillet is very hot, divide beef into large, irregular chunks by using two spoons or your hands and drop into the skillet. Cook, undisturbed, until charred and crisp on the underside and browned at least halfway up the sides, 6 to 8 minutes.
4. Using a wooden spoon, toss the meat, breaking up any very large pieces. Add the walnuts and raisins and continue to cook, stirring often, until the meat is cooked to desired doneness and the walnuts are toasted, 2 to 3 minutes more.
5. Remove the yogurt from the fridge and season with the remaining 1 teaspoon of salt. Spread the yogurt on the bottom of a serving platter and top with the crispy meat. Finish with a drizzle of pomegranate molasses, if using, and garnish with mint leaves. Serve with warmed pita or rice.
TIPS: To minimize eye irritation while grating, use a chilled onion.
Two tablespoons of pistachios or pine nuts can be substituted for the walnuts.
Garlicky Chicken Thighs With Scallion and Lime
These tangy chicken thighs are a weeknight alternative to a long, weekend braise. They may not fall entirely off the bone, but the quick simmer in a rich, citrusy sauce yields an impossibly tender thigh that you wouldn’t get with a simple sear. Serve with rice, whole grains or with hunks of crusty bread for mopping up the leftover sauce. — Alison Roman
Yield: 4 servings. Total time: 35 minutes.
Ingredients
1 1/2 pounds bone-in, skin-on chicken thighs
Kosher salt and freshly ground pepper
1 tablespoon canola oil
1 bunch scallions
1 head garlic, unpeeled and halved crosswise
2 cloves garlic, peeled and finely grated
2 tablespoons fresh lime juice, plus 1 lime
1 tablespoon low-sodium soy sauce
DIRECTIONS
1. Season chicken with salt and pepper on both sides.
2. Heat oil in a large Dutch oven or large, high-sided skillet over medium heat.
3. Add chicken, skin-side down and cook, undisturbed, until chicken is crisped and the fat has begun to render, 8 to 10 minutes. Using tongs, carefully flip chicken skin-side up. Cook until golden brown, 4 to 6 minutes.
4. Meanwhile, thinly slice two scallions; set aside.
5. Add both halves of the head of garlic, cut side down, and remaining whole scallions to the pot and season with salt and pepper, tossing to coat in the chicken fat. Cook until scallions are lightly blistered and browned, about 3 minutes. Add grated garlic and stir a minute or two, but do not brown.
6. Add lime juice, soy sauce and 1 cup of water. Bring to a simmer and partly cover. Cook until chicken is completely tender and nearly falling apart on the underside and liquid is reduced by three-quarters, 15 to 20 minutes. Discard the halved head of garlic.
7. Scatter sliced scallion over chicken and using a Microplane or zester, zest lime over. Cut lime into quarters and serve alongside.
Crispy Potato Quesadillas
Despite what many people think, quesadillas don’t always have cheese. In Mexico City, you can order a “quesadilla sin queso” with a variety of fillings, highlighting the regional debate around what constitutes a true quesadilla. This version embraces both worlds: It contains cheese, but it’s melted into a hearty potato and pea filling that makes these quesadillas more satisfying as a complete meal. The quick slaw on top, inspired by curtido (a vinegary cabbage salad popular throughout Central America), balances the richness of the quesadillas and provides a nice spicy crunch. If you have any slaw left over, it keeps for up to four days in the refrigerator and is versatile enough to serve with plain rice or grilled meat or fish throughout the week. — Kristina Felix
Yield: 4 servings. Total time: 35 minutes.
Ingredients
Kosher salt
1 pound potatoes, unpeeled but scrubbed clean
1 cup peas, frozen or fresh (6 ounces)
2 cups shredded semisoft cheese, such as Monterey Jack or cheddar
11/2 tablespoons avocado or vegetable oil
8 (7- to 8-inch) flour tortillas
1/4 medium green cabbage, thinly sliced (about 4 cups)
2 carrots, grated
1/2 red onion, thinly sliced
1 jalapeno or serrano, diced (seeded for less spice, if desired)
1 lime, juiced
3 tablespoons white or apple cider vinegar
11/2 teaspoons sugar
Sour cream or Mexican crema, optional, for serving
DIRECTIONS
1. Heat oven to 400 degrees.
2. Fill a medium pot with water; add 2 tablespoons salt and set it to boil on high. Cut potatoes into 1-inch chunks and place them in the pot as you go. Once the water is boiling, lower the heat slightly to maintain a rolling boil and cook potatoes for 5 to 7 minutes, until easily pierced with a fork. Add the peas and cook for 3 minutes more. Drain the vegetables, return them to the pot, add the cheese and mash until fully combined. Add more salt to your taste.
3. Add the oil to a baking sheet and spread it around evenly using one side of a flour tortilla, then repeat with another until you have 4 tortillas lightly oiled on one side, evenly arranged on the baking sheet (it’s OK if they overlap a bit.)
4. Divide the mash among the tortillas. Top each with a second tortilla and press down until the filling almost spills out. Flip the quesadillas so the other side gets oiled.
5. Bake for 8 minutes, flip the quesadillas over, and bake for another 8 minutes until browned and crispy. They may puff up, which is great.
6. Meanwhile make the topping. Combine the cabbage, carrots, red onion, jalapeno, lime juice, vinegar, sugar and 11/2 teaspoons salt. Toss the slaw with your hands and taste to adjust for vinegar, salt or sugar until the slaw is to your liking.
7. To serve, quarter the quesadillas with a sharp knife and top with slaw and a dollop of sour cream, if using.
